Monday, March 26, 2007

Burnt Paper

Ever wondered how to create the torn paper look that you see on countless sites? Well its your lucky day because I’m going to show you how to create the effect using nothing but Photoshop!


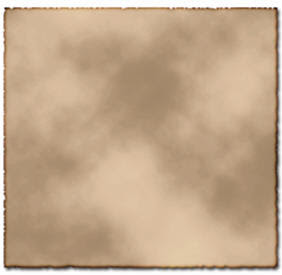
[ The Final Product of this Tutorial ]


Steps to Create Effect
The following steps will help you to create the image effect you see above:

  • Start Photoshop up and create a new RGB document 400 by 400 pixels and with the image resolution set at 72 dpi, and set the background colour to white.
  • Set your foreground colour to #E8DEB1 and your background colour to #D2C388. With that done create a new layer and on this layer select the rectangle marquee tool and drag out a rectangle to the size you want your paper to be.

  • When you’ve decided your size STILL with the rectangle selection go to Filter | Render | Clouds. Your document should look like below:


    [ how your image should look now ]


    Still with your selection go to Image | Adjustments | Equalize, when you’ve selected the option you will be prompted with a dialogue box. Check ‘equalise selected area only’ and press OK:

    If your paper is looking a little bright simply press Ctrl + U to bring up the Hue/Saturation option box and mess around with the settings until you are comfortable with the colour of your paper texture.

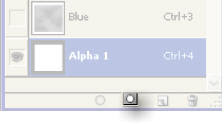
    Still with your selection click on the Channels tab which is located next to the layers tab and click on the ‘save selection as channel’ button:


    [ the channels tab ]


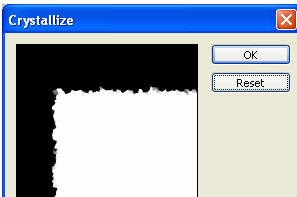
    Now you can finally de – select your selection by pressing Ctrl + D. Click on the Alpha 1 layer you have just created and go to Filter | Pixelate | Crystallize and set Cell Size to 5. Then press OK.


    [ crystallize and set Cell Size to 5 ]

    1. Hold down Ctrl and click on the Alpha 1 channel you have just created, with the selection click on the layers tab to go back to where you originally started off. Click on ‘Layer 1’ and then click on ‘Add layer mask’.
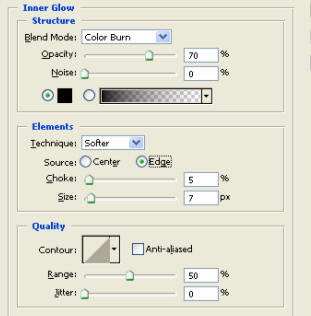
    2. Nearly finished on the masked layer you just created click on the ‘add a layer style’ button and add a drop shadow (using the default settings) and add an inner glow using the below settings:


    [ inner glow ]


    here you have it - a burnt piece of paper. If you need any help, please comment..

    You can also do some thing extra,,, like using burn tool in between of ur paper

    thanks

    HEY I HV FOUND SOME OF THE COOLEST WEB SITE

    www.2advanced.com


    http://www.gettheglass.com/ 3D WORK ,VERY nice site by the milk board.

    http://www.tskuebler.com/

    This site itself is simple, but the sculpture is excellent!

    http://www.liquidjourney.com/

    It contains the most impressive flash experiments I have seen anywhere.

    Gucci - great html and js

    www.gucci.com


    nice transitions

    http://www.clusta.com/


    nice site, great for YouTube videos
    splicemusic.com

    Video Tutorial

    enjoy it


    HEY! SEE THE NEW SITE WWW.GIZMOCALL.COM JUST REGISTER AND YOU CAN CALL FOR 10 MIN FREE AROUND THE WORLD. ENJOY..........


    Wednesday, March 21, 2007

    For Beginners Of Photoshop

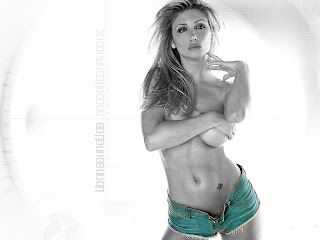
    In this trick i will show how to create half black and white and half coloured image using photoshop.............


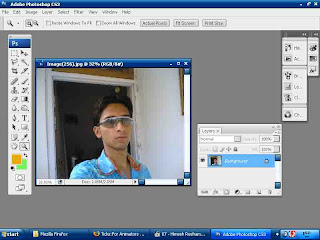
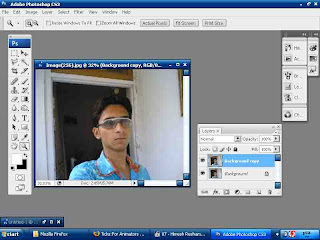
    1. In first part we will take a coloured image like given below......


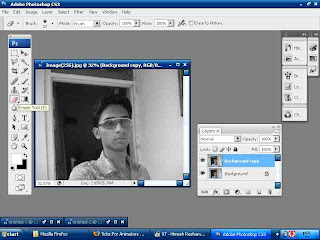
    2. Now we will create a new layer ...... (see below)


    2. Now in new layer , desaturate the image to make it black and white . (you can desaturate image by going to , IMAGE>> ADJUSTMENT>>DESATURATE )


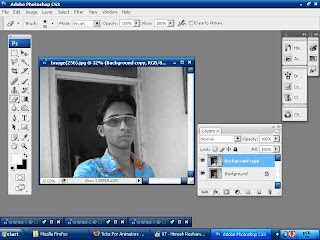
    3. Now when your image is black and white you can take eraser tool .. and start rubbing on the first layer that you have created ..

    [ NOTE..] - YOU HAVE TO RUB THAT PORTION OF IMAGE THAT YOU WANT TO MAKE COLOURED

    NOW THE FINAL RESULT THAT YOU WILL GET IS GIVEN BELOW


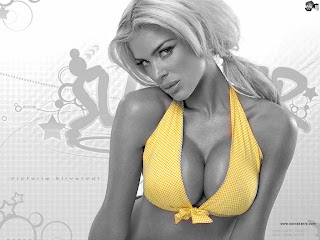
    NOW I KNOW THAT THIS IMAGE IS NOT LOOKING VERY COOL .. NOW THE COOLEST IMAGES ARE GIVEN BELOW... Hmmmmmm.....


    THANKS,

    Tuesday, March 20, 2007

    Bevel in Flash

    NOW I WILL TELL U SOME USEFUL TRICKS ABOUT FLASH.................

    Ever wished you could use Photoshop's bevel effect in Flash? That's right; Flash isn't known for easy style effects, but with my simple beveling technique, you can work around Flash's rather bland palette.


    [ an example of what you will create ]


    Here is How

    1. Create a new document around 400 high by 200 wide.

    2. Rename the default layer "dark" because you'll be using a dark green on this layer.

    3. Type in "Mo Money" with the text tool and draw in any squigqly line with the brush tool. The text must be broken up for the beveling to work, so just select it and hit Ctrl+B twice.


    1. Select everything on layer "dark" and copy it by hitting Ctrl+C
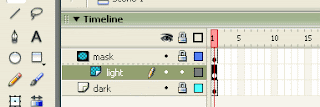
    1. Create two new layers. Name the top "mask" and the middle "light." On both, paste your design in the exact place as the original by hitting Ctrl + Shift + V.

    2. Of course, you should right click your mask layer and check "mask" to turn it into a mask.


    [ correct layer set-up]


    Now you want to lock everything but the light layer. Select it and change its color to a lighter green. Before deselecting, nudge the light design up one and left one with the arrow keys.


    [ light graphic shifted up and left ]


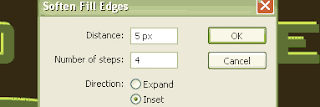
    We want this to be a smooth bevel, so choose modify > shape > soften fill edges from the main menus. Change the settings like such...


    [ here are some suggested settings ]


    Lock all layers to make the masking go into effect. And voila! You have your bevel.


    Monday, March 19, 2007

    PhotoShop Scripting

    You’ve probably wanted at one time or another to combine the power of Photoshop’s tools to those of programming scripts. Adobe has made this possible for you with the ‘Scripting Plug-in’, a nifty plug-in that allows users to write little scripts (in Javascript, VBScript or AppleScript) that will take over Photoshop and do what you couldn’t with you mouse and keyboard…

    This tool is also aimed at designers which wish to increase the workflow speed (you'll see example scripts by the end of the tutorial which allow you to save all your current images, or save each layer to a separate file etc...). Even though we do use a scripting language, it is not hardcore programming and designers which hate programming should not be scared of this, the step by step tutorial will help you create your first simple scripts and you will later be able to move on to more advanced scripts.


    Photoshop scripting is much more than what actions and batching can do; for example you can use the ‘if…then’ commands which already multiplies possibilities… Imagine you have a text database, hundreds of pictures, and want to dynamically create business cards – seems tough ? Scripting will do it. It is a unique and excellent tool to automate your needs and save you time, or create something that a human and a mouse would take ages to do.

    This tutorial will, through a series of projects, demonstrate some of the capabilities of scripting. This tutorial is aimed at intermediate/advanced users who use Photoshop extensively. I assume you know about batching & actions, and most of Photoshop already. The tutorial is set this way: a) example of what we will create. b) full code c) code explanation... So don't worry if at first you only see a bunch of scripted lines.

    All you'll need for that tutorial is a text file editor, Photoshop and to install the plug-in


    Contents:
    I have broken this tutorial into many sections, start from the beginning if you have never met scripting.


    I. Preliminary steps

    If you have a version of Photoshop CS, you can skip the downloading instructions below, since the scripting plug-in is installed with CS by default. The tutorial uses scripting with Photoshop 7 – some scripting capabilities have been improved since then, so don’t be alarmed if you CS version can do in two steps what I’ve scripted in ten :P… And, on a sidenote,

    Downloading instructions: you can download the plug-in for version 7 of PS on Adobe’s web site by searching for ‘scripting plug-in’ – the latest links were here (for Mac) or here (for PCs). Installation will create a ‘Scripts’ folder in the ‘Presets’ folder of Photoshop.


    Getting familiar with scripting: you can now check your scripts; which you can test by using the menu File>Automate>Scripts (you can try to alt/apple click in the dialog box to run your script with a debugger)
    (Note
    Edit your scripts with simple text applications (textpad) otherwise Photoshop might have trouble processing them …)


    I will use ONLY JavaScript in my examples because it’s the only cross-platform language. Keep in mind that the same scripts can be written in VBScript and Applescript (and much more, since you can script more applications and call them from these scripts, and not in JS) but the syntax is a bit different (check the doc for changes).


    III. Using Text Layers and Saving Files


    Creating and editing text options, saving your file.


    It already looks a tad more interesting doesn't it ?

    The keys in doing it are:

    • Opening a new 600x900px canvas

    • Creating an array full of text

    • Creating a loop that will create text layers according to the array

    • Setting specific color & text size for each text layer

    • Rotating with a 45? angle each layer

    • Saving the document

    • Closing the document
    i. Code (explained below)


    • ((     var defaultRulerUnits = preferences.rulerUnits;
      preferences.rulerUnits = Units.PIXELS;

      bgGrey = new SolidColor();
      var lightness = 255 - Math.round(Math.random()*100);
      bgGrey.rgb.red = lightness;
      bgGrey.rgb.green = lightness;
      bgGrey.rgb.blue = lightness;

      backgroundColor = bgGrey;

      var newDocumentRef = documents.add(600,900, 72.0, "Working With Text",DocumentMode.RGB, DocumentFill.BACKGROUNDCOLOR);
      newDocumentRef = null;

      var textArray = [
      "Silence prevailed as",
      "those mochi balls",
      "screamed in agony",
      "and unbearable disbelief",
      "…"
      ] ;

      var AD = activeDocument ;

      for(a=1;a<=textArray.length;a++){
      var TextLayer = AD.artLayers.add();
      TextLayer.kind = LayerKind.TEXT;
      TextLayer.opacity = Math.round(Math.random()*50)+50;
      //TextLayer.name = textArray[a-1];
      var txtRef = TextLayer.textItem;
      txtRef.font = "Impact";
      txtRef.contents = textArray[a-1];
      txtRef.size = Math.round(1/(Math.random()*0.2+0.02))+10;
      var textPosition = [0,Math.round(Math.random()*880)+10];
      txtRef.position = textPosition; TextLayer.rotate(-45)
      }

      AD.flatten();

      activeDocument.crop(new Array(25,25,600,800), 0, 600-25, 800-25, 72);

      saveFile = new File("//scriptingTest.jpg");
      saveOptions = new JPEGSaveOptions();
      saveOptions.embedColorProfile = true;
      saveOptions.formatOptions = FormatOptions.STANDARDBASELINE;
      saveOptions.matte = MatteType.NONE;
      saveOptions.quality = 9;

      AD.saveAs(saveFile, saveOptions, true,Extension.LOWERCASE);
      AD.close(SaveOptions.DONOTSAVECHANGES) ;

      preferences.rulerUnits = defaultRulerUnits;
      ) )

    Well I hope the script brought some light to you. Make sure to play with it, invent new crazy scripts.


    [ Here's what a modified version of the script can do. Check it out !]


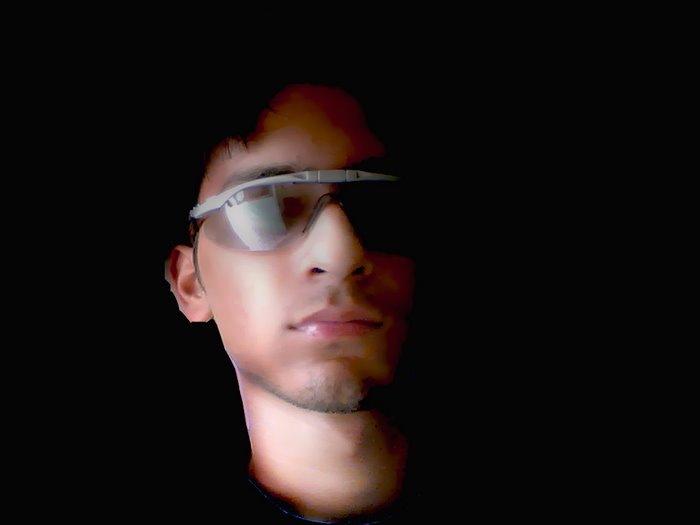
    This is a image that i hv morphed from me my brothers image ....... using photoshop...


    This Is a B.G that i hv created in 5 min. howz that............