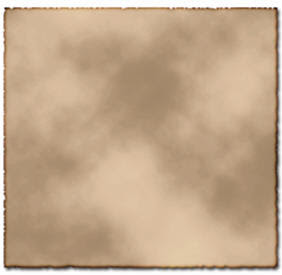
[ The Final Product of this Tutorial ]
Steps to Create Effect
The following steps will help you to create the image effect you see above:
When you’ve decided your size STILL with the rectangle selection go to Filter | Render | Clouds. Your document should look like below:

[ how your image should look now ]
Still with your selection go to Image | Adjustments | Equalize, when you’ve selected the option you will be prompted with a dialogue box. Check ‘equalise selected area only’ and press OK:
If your paper is looking a little bright simply press Ctrl + U to bring up the Hue/Saturation option box and mess around with the settings until you are comfortable with the colour of your paper texture.
Still with your selection click on the Channels tab which is located next to the layers tab and click on the ‘save selection as channel’ button:
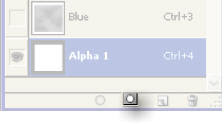
[ the channels tab ]
Now you can finally de – select your selection by pressing Ctrl + D. Click on the Alpha 1 layer you have just created and go to Filter | Pixelate | Crystallize and set Cell Size to 5. Then press OK.
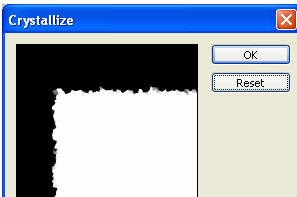
[ crystallize and set Cell Size to 5 ]
- Hold down Ctrl and click on the Alpha 1 channel you have just created, with the selection click on the layers tab to go back to where you originally started off. Click on ‘Layer 1’ and then click on ‘Add layer mask’.
- Nearly finished on the masked layer you just created click on the ‘add a layer style’ button and add a drop shadow (using the default settings) and add an inner glow using the below settings:
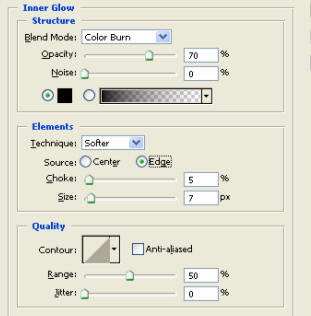
[ inner glow ]
here you have it - a burnt piece of paper. If you need any help, please comment..
You can also do some thing extra,,, like using burn tool in between of ur paper
thanks



No comments:
Post a Comment