Have you ever been to a site such as http://mimmomanes.com/ and wondered how to create the dot effect on the splash page. Well this tutorial will show you how to use a combination of filters and lighting changes to create the effect in Photoshop 7! This effect can be blended well with some grungy effects, so feel free to expand and experiment to make the effect more original to your liking

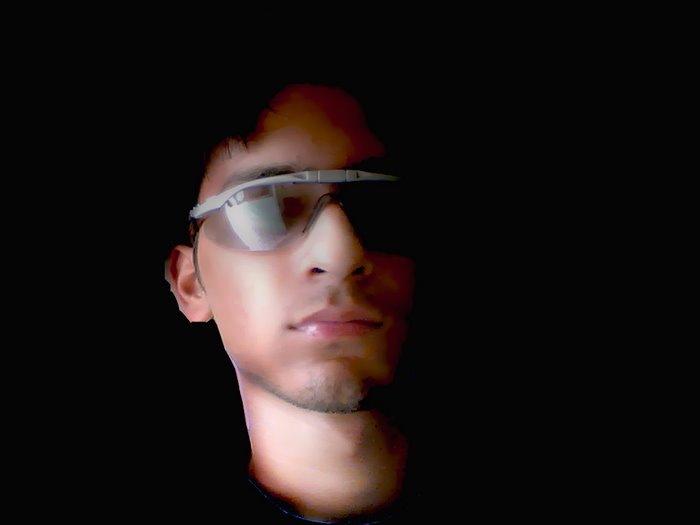
[ The Final Product of this Tutorial ]
Steps to Create Effect
The following steps will help you to create the image effect you see above:
- Copy the original image from here (free membership required). You can also use any other image of your choice. Start Photoshop up and create a new RGB document 2048 by 1536 pixels and with the image resolution set at 72 dpi, and set the background color to white.
- Go to Edit-Paste. (don't resize the image, just zoom out to see the entire thing). Once you have pasted the image, go over to your layers, Right Click the image part in Layer 1, and go to Select Layer | Transparency.
- Now go up to Image-Adjustments-Hue/Saturation. (Ctrl + U) Move the Saturation slider to -80, and the Brightness slider to +5. Click Okay.
- Now go to Image-Adjustments-Brightness/Contrast. Adjust your sliders to match the following:

[ make sure to check the preview box ]
- Still with your selection go to your Layers, and Duplicate Layer 1. Now select "Layer 1 copy" [right click-select layer transparency].
- Go to Filter-Pixelate-Color Halftone and adjust the settings to match the following:

For Channel 3, enter 90 and for Channel 4, enter 45.
- Now lets add some noise! Go to Filter-Noise-Add Noise, and adjust the settings according to the following:

[ the hue/saturation settings used ]
- Next, you need to copy the dot below, and create a pattern out of it:
![]()
[ copy the above image, and paste it in a new document ]
- Once you have the layer that the dot is in selected, go to Edit-Define Pattern. Name it Circle. Now go back to your main document, and create a new layer in between Layer 1 copy and Layer one. Name this new layer "pattern".
- Go to Edit-Fill, and your pattern should be in the box that appears. Click OK, which should apply the pattern to the whole canvas.
- Look at your layers palate, and locate the drop-down menu in which Normal is the selected option. Change that to Overlay. Now look at the Opacity percent, and lower it to 88%.
- Single click on Layer 1 copy, and change the layer setting (the drop down menu under the Layers tab) to Pin Light. Now it's time to reduce your image size. Go to Image-Image Size. and make your settings match the following:

- Select Layer 1 copy, and go to Image-Adjustments and set the Contrast Level to +50 and the Brightness Level to +15. Lower the Opacity to 69%.
That's it! Your image should look identical or similar to the image at the top of this tutorial. If you need any help, please post


No comments:
Post a Comment